 PixelyChat
 Getting started
Set up your first stream
Choose the interface language, turn on the feature groups you want, then connect at least one streaming platform.
Before you start
Have PixelyChat open on your streaming computer, your streaming account ready, and OBS Studio or Streamlabs installed if you want chat on your broadcast.
You can use PixelyChat just to read chat. Adding a Browser Source is only needed when you want viewers to see an overlay.
1. Connect your first account
- On the Welcome screen, choose your interface language. Enable the features you want to start with; you can add more later.
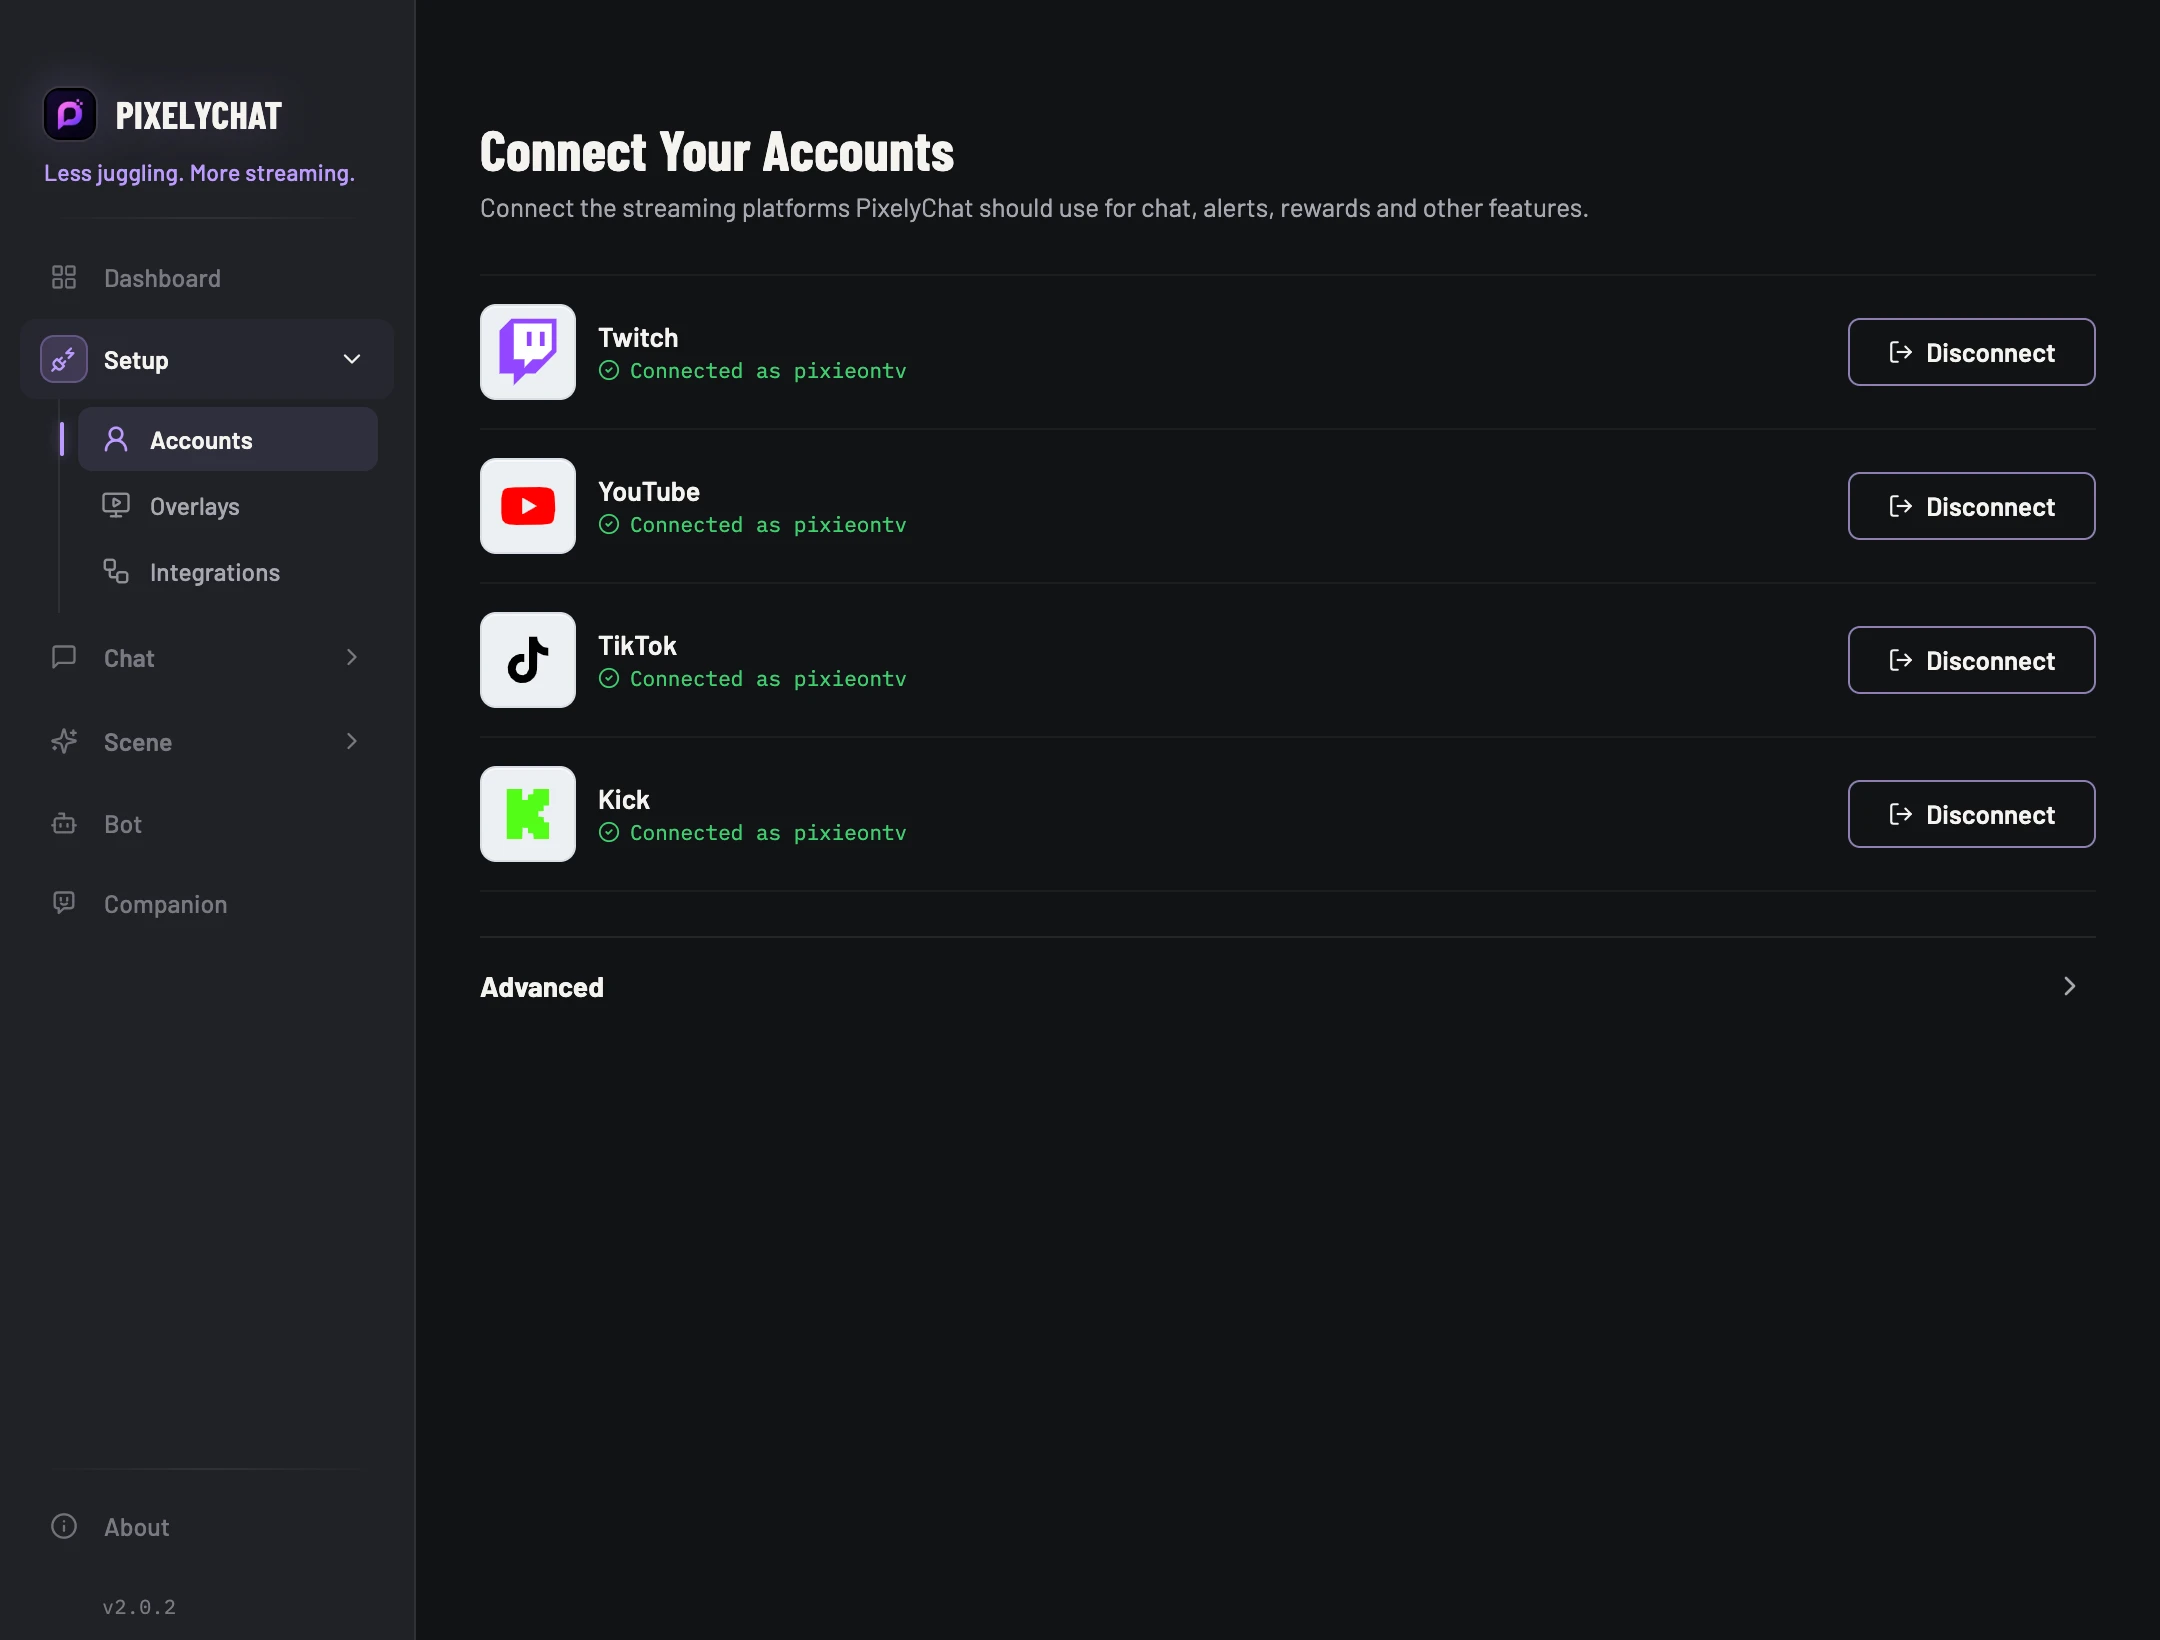
- Open Accounts and choose the platform you stream on.
- Complete the sign-in and authorization prompts for your streaming account. Return to PixelyChat.
- Open Dashboard and check that the correct channel appears as connected. Repeat for your other platforms when you are ready.
2. Check that messages arrive
- In Dashboard, find Live Chats. Select the combined feed or the platform you just connected.
- Have a viewer send a short message in your channel’s chat, or send one through the platform’s own chat page. Platforms that only provide chat during a live broadcast need an active stream.
- Look for that message and its platform icon in PixelyChat.
Your real channel message appears in Dashboard. A sample message in an editor preview does not confirm your account connection.
TikTok chat is read-only in PixelyChat. Sending and moderation controls vary by platform, so not every channel has the same actions.
3. Add chat to your stream
- Open Chat → Overlay and choose a style. Start with the default appearance; you can adjust fonts, colors and layout after the source works.
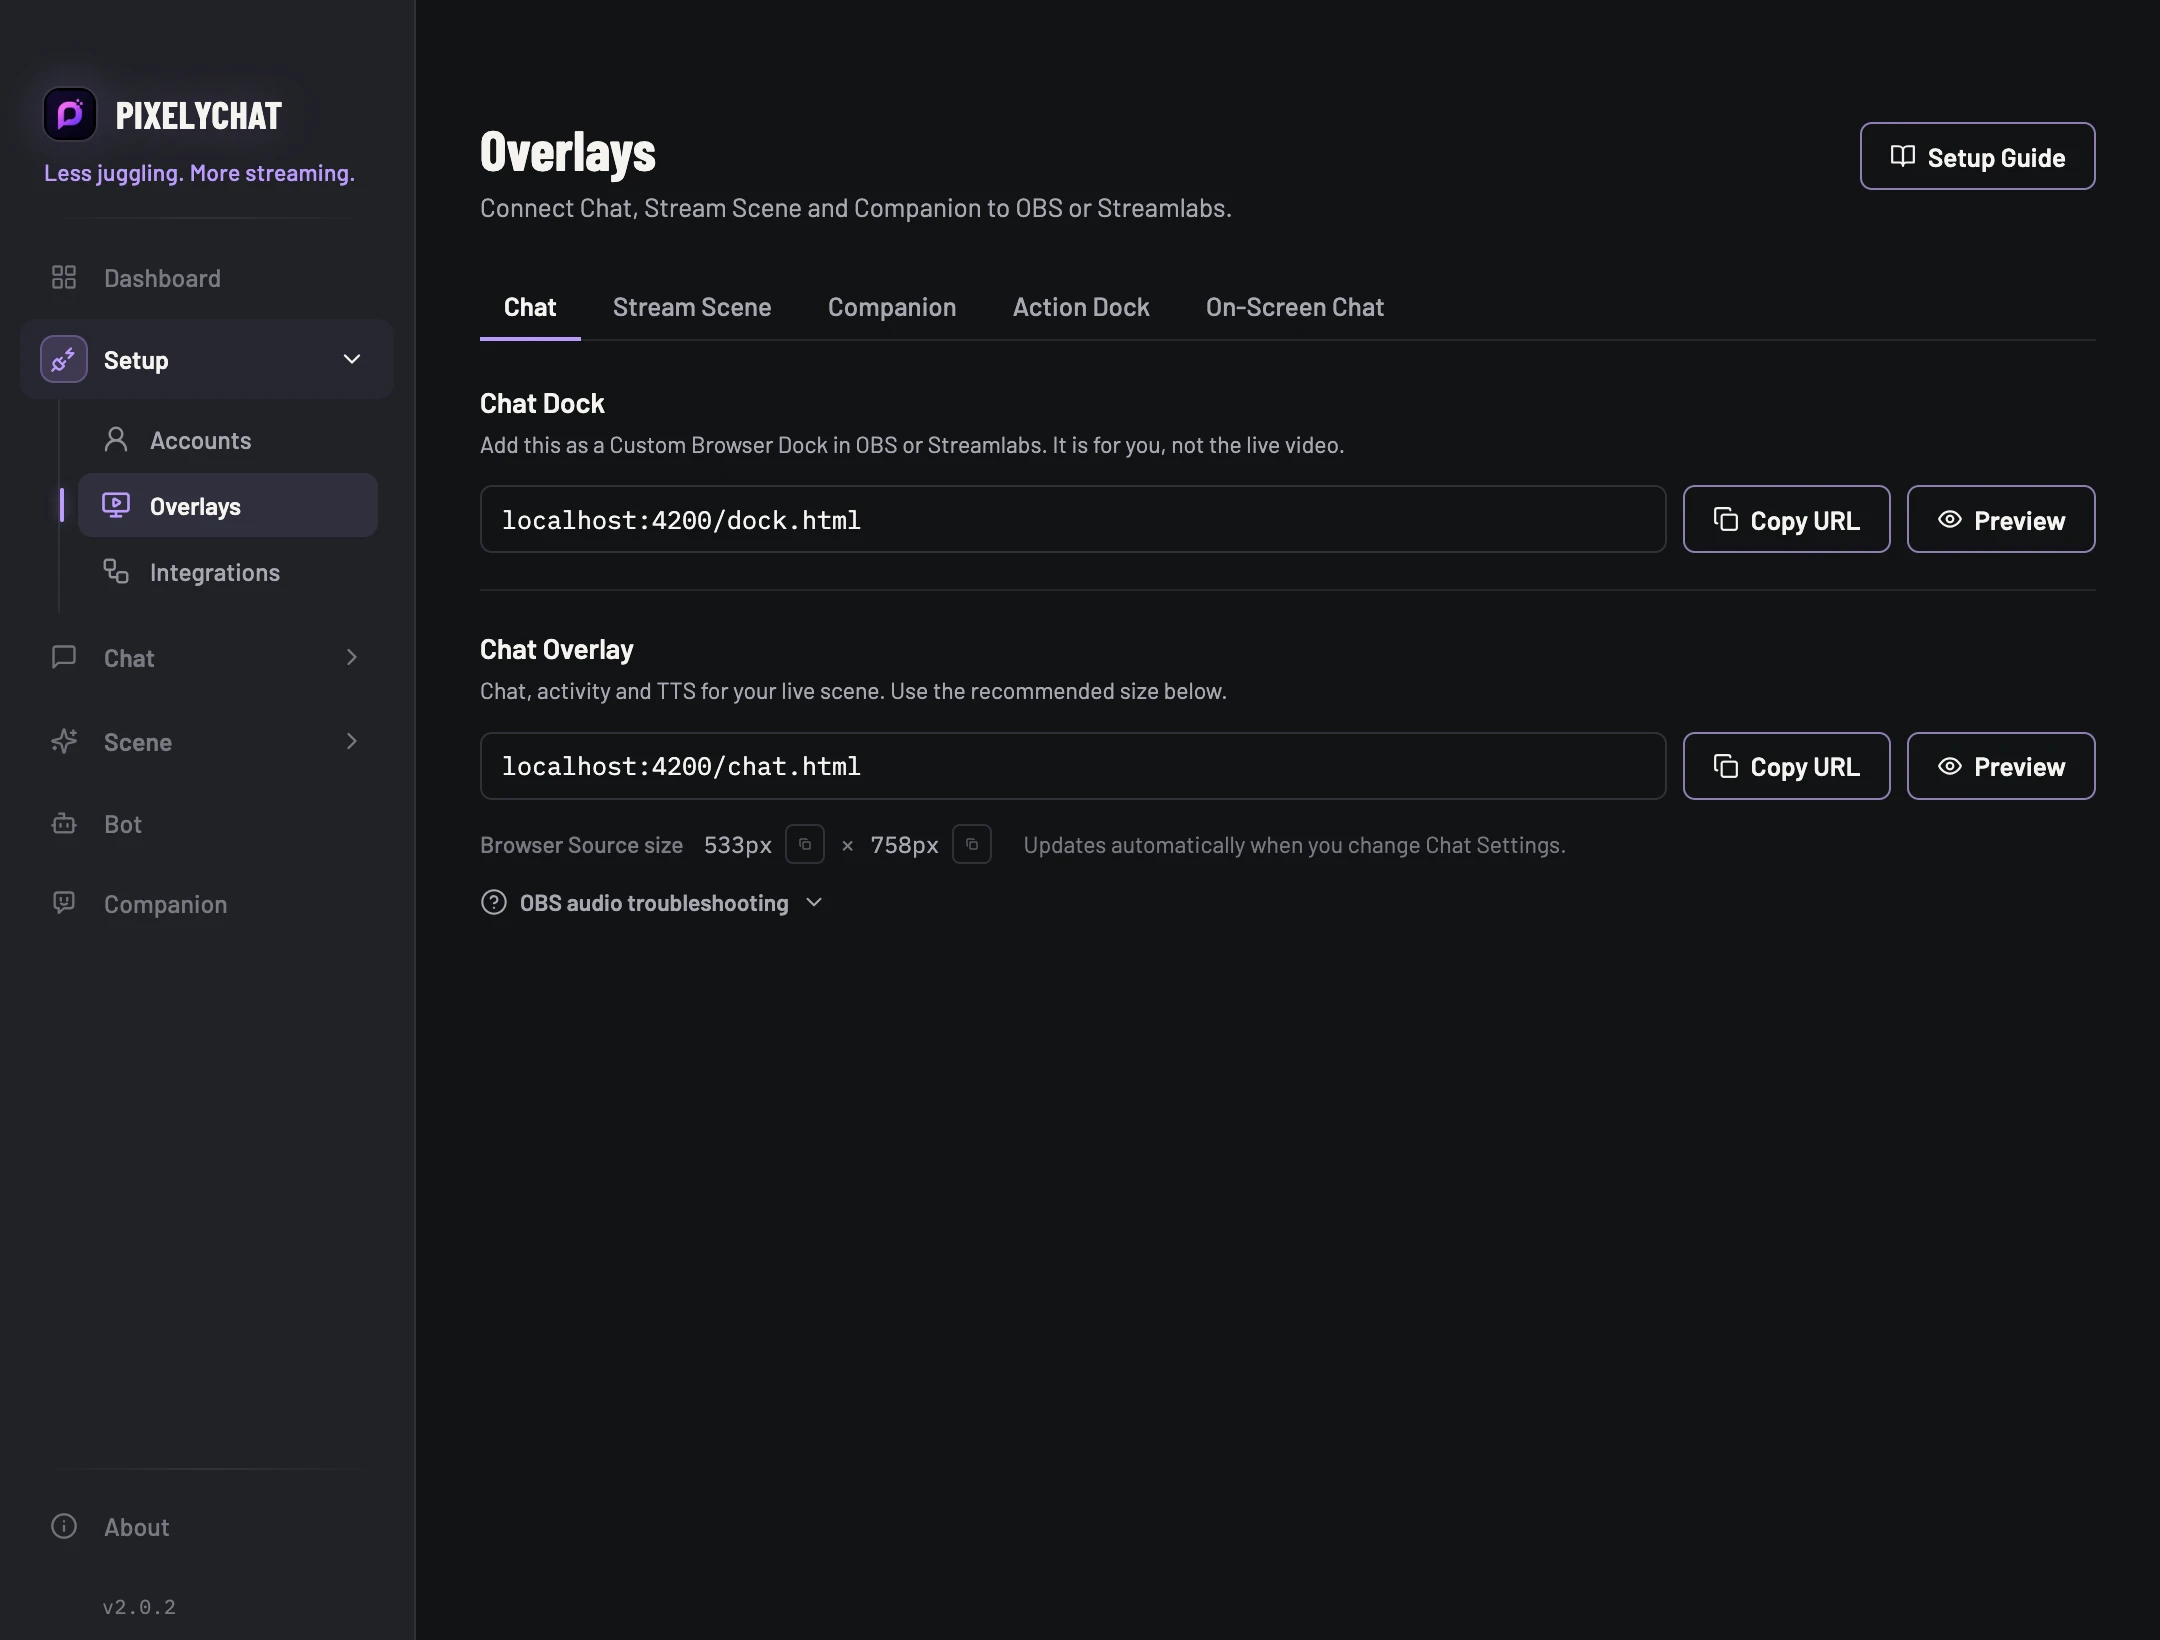
- Open Overlays → Chat and copy the Chat Browser Source URL.
- In OBS Studio, select your scene. In Sources, select + → Browser, give the source a recognizable name such as “PixelyChat chat,” and paste the URL. In Streamlabs, add its Browser Source and paste the same URL.
- Set the source dimensions to match the layout you are configuring. Position the source where you want chat to appear, and keep it above your game or background in the source list.
- Keep PixelyChat running while you use the overlay.
4. Verify the result
- With the OBS scene visible, send another channel message.
- Confirm it arrives in both Dashboard and the chat overlay in OBS.
- Adjust the overlay’s appearance in PixelyChat and check the result in OBS. You normally do not need to recreate the source after an appearance change.
- Before going live, make a short recording and watch it back to check placement and any audio you have enabled.
You can read real chat in PixelyChat and see the same messages in your streaming scene. You can now add alerts or an interactive widget.
If something doesn’t work
No messages in Dashboard
Check the account and connection status in Accounts. Confirm the channel has an active chat, then remove any platform or activity filter that could hide the message. Reconnect an expired session before testing again.
Dashboard has messages, but OBS is empty
Check that the Browser Source uses the Chat URL, is visible in the current scene and is above any full-screen background. Keep PixelyChat running. Check Dashboard’s Overlay Status; an inactive source in an unloaded scene is expected.
I can see chat, but cannot hear speech
Displaying chat does not automatically enable speech. Configure Speech, preview the selected voice, and check the source and mixer volume in your streaming software. Continue with the Speech reference for voice and message rules.